How to vibe code: 11 vibe coding best practices to start building with AI

PeopleImages // Shutterstock
How to vibe code: 11 vibe coding best practices to start building with AI
Things are frankly ridiculous right now with AI building—in the best possible way. Vibe coding tools like Lovable, Bolt, and Cursor are democratizing software development. And that means that you can more or less just jump in and start creating, experimenting all you want, with no constrictions.
But if you want to build something sturdy, you’ll need to go in with a plan, rather than expecting a complex finished project in a few prompts.
To help you vibe, Zapier put together tips for starting a vibe coding project that has the potential to result in a usable final product, based on insights from industry folks.
Don’t expect magic
With all the excitement over one-shot prompts to finished projects, starting with a simplicity mindset is pretty hard to do. So many shiny things, so little patience.
But trying to build an entire project with one prompt is a losing battle. No matter how detailed your request is, the AI won’t fully respect every aspect of it.
“Solve small problems. Don’t try to go build it all with one prompt,” Michael Lembo, staff product manager at BitGo, recommends.
Keep reading to get a hefty handful of tips about all the things you need to do before you even start building.
Write a product requirements document (PRD)
Before you even start building, create a product requirements document (PRD). It’ll be the building plan for your app, in clear and detailed language.
You’re building the PRD to help your favorite vibe coding tool follow your vision in a structured way, yes. But it’ll also help you get clear on what you want and how you’re going to get there. It’s an opportunity to think through the finer details of how your final product should function and what technologies you’ll need to incorporate to make that happen.
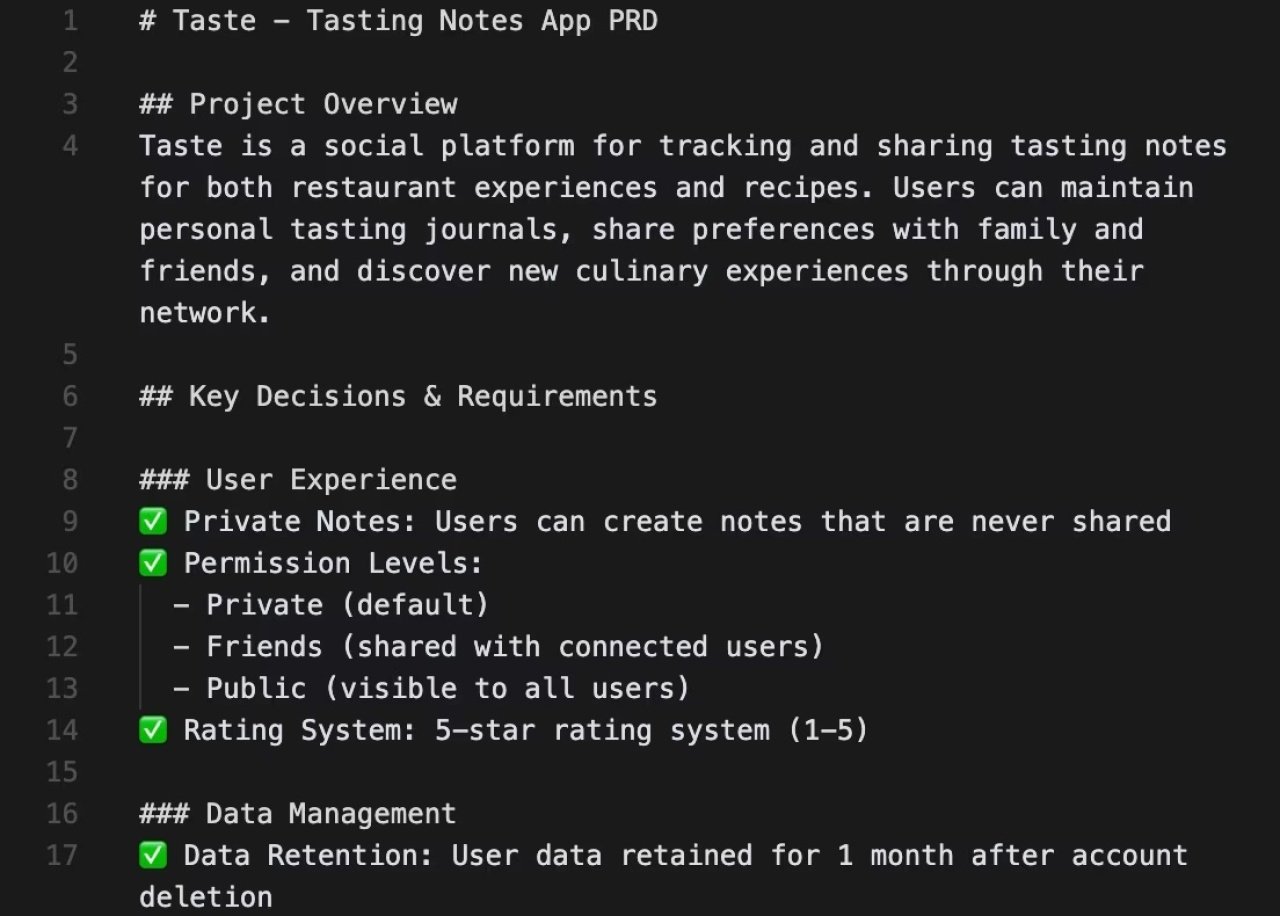
Try building out your PRD in an AI chatbot like ChatGPT or an AI code editor like Cursor. Provide an initial prompt for what you want it to do and ask it to generate its first take on the ideal project PRD. Then edit the PRD based on any incorrect assumptions you want to set straight before the build.
Zapier
Your PRD should include the following, at a minimum:
- A clear description of what your app does, who it’s for, and how it functions.
- Technologies underlying each function (and their purpose).
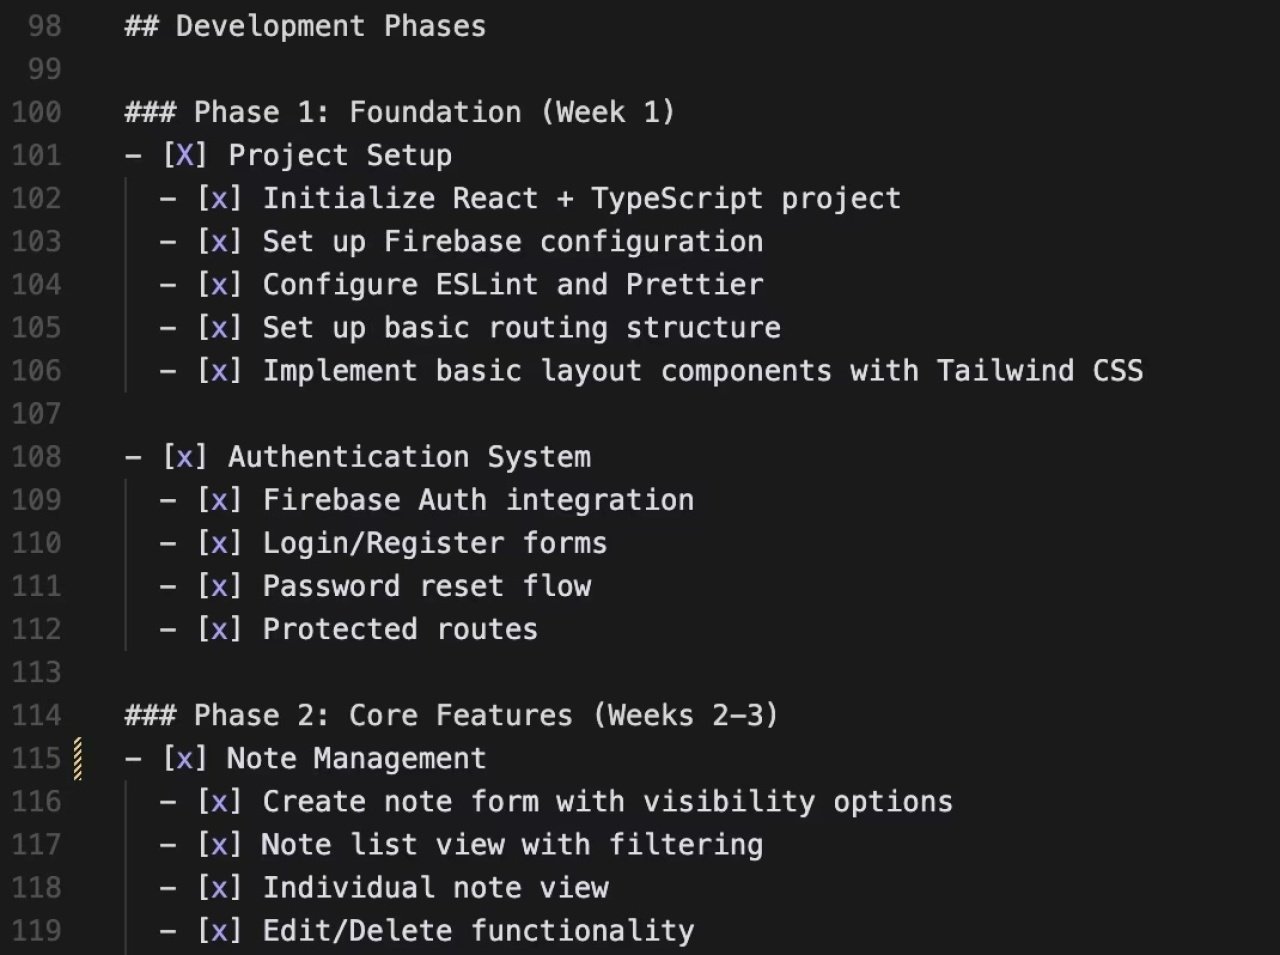
- Project milestone stages and details—this is important; you’ll use these like a compass during the build phase.
Zapier
This kind of detailed planning will also help you save your credits when you move into your AI coding app. As Matt Medeiros, publisher at The WP Minute, suggests, “Take your time. Spend resources planning your app before you jump into vibe coding in Bolt or Lovable. Use vanilla ChatGPT or another LLM to prove and test your ideas before writing code.”
Co-Maker of ttyl, Robinson Greig, says, “Good instructions yield good results. Take the time to write detailed requirements.”
Wireframe your user interface (UI) first
Alfred Megally, vibe coder and independent creative, says: “Think about how a user would flow through your project from beginning to end.” That will help you—and your AI creative partner—think through the logic of what you want to build, influencing the later steps in the process.
Think of it as a pressure test for your PRD. Test your assumptions, and then make updates to the PRD after going through this process and discovering where logic breaks down.
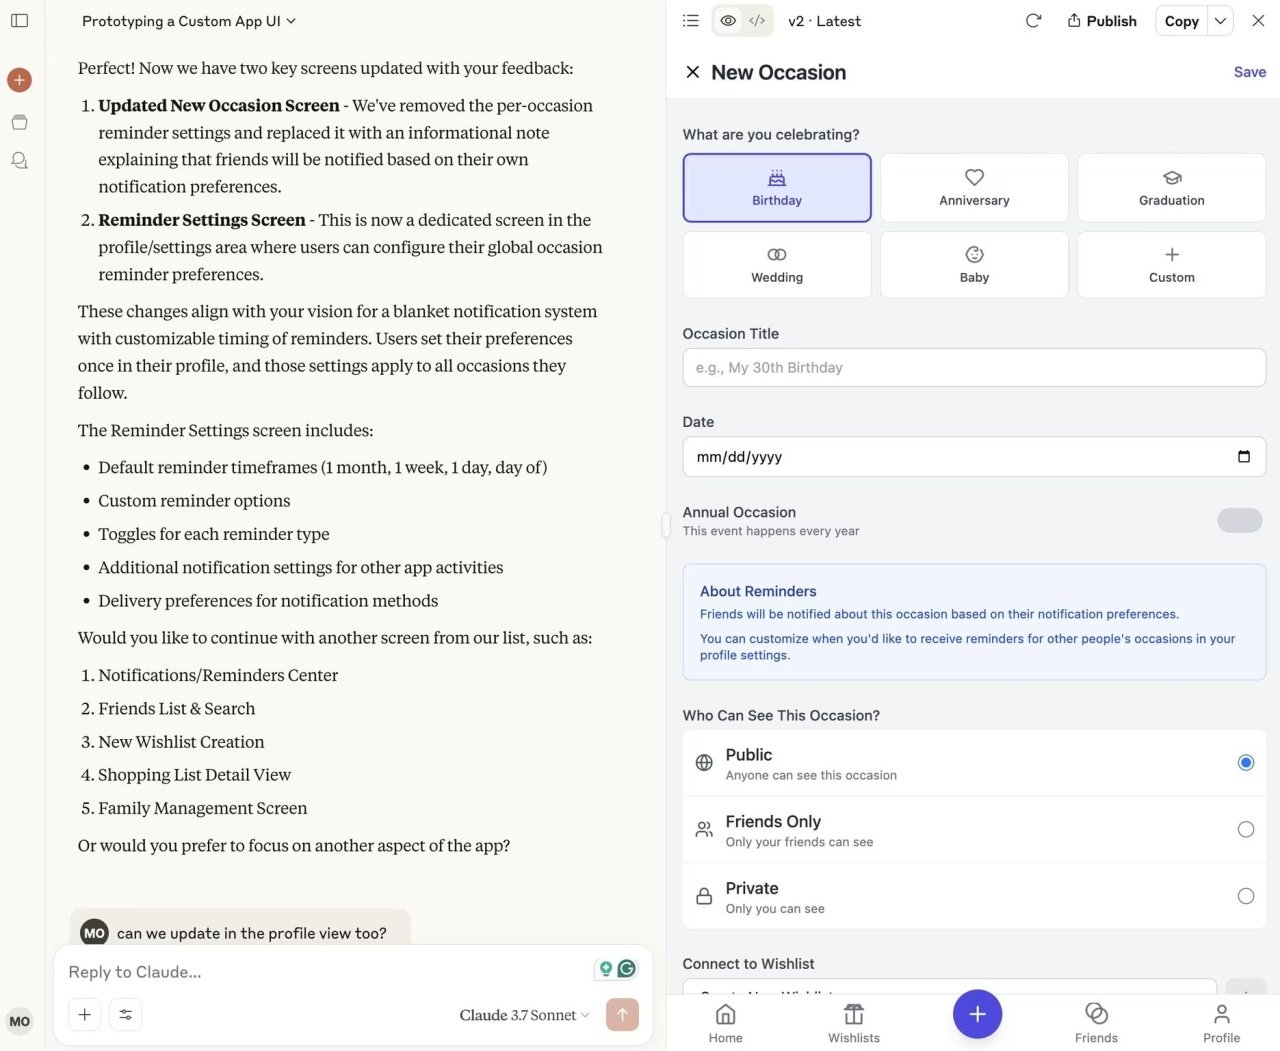
Try working with Claude to build a wireframe of a UI in the early stages of a project. Then, once you’re ready to build a more functional UI that incorporates more distinct branding elements, move to an AI coding app like Lovable. Or you could even try a purpose-built wireframing app.
Zapier
Think of your wireframe as a rough draft—the UI will undoubtedly change when you’re in the thick of the build process, but this will help you get into the shoes of your users.
Set up GitHub for version control
GitHub is a web app for sharing code. Use it to create a repository for each project, and push code changes along the way for simple version control and collaboration.
GitHub has native (or otherwise seamless) integrations with most vibe coding tools, so it works even if you move across platforms during your build. For example, if you started building in a Lovable, you could push your Lovable code to GitHub and then pull it into a project in Cursor. This approach takes advantage of each tool’s unique strengths: Lovable’s UI building and Cursor’s back-end building.
If you’re already mid-project, you can set up a GitHub repository at any point in the build, but it’s a best practice to have it in place from the start. And when things are working, push those changes to GitHub (often).
If you’re new to GitHub, check out Morten Rand-Hendriksen’s Git from Scratch course on LinkedIn Learning to dive in a bit deeper.
Create global rules
Each vibe coding platform has its own way of handling overarching account and project preferences. No matter which tool you’re using, make sure you set up these global rules.
If you’ve ever created a custom GPT, you’ve done this before. The following example uses Cursor because it has the most robust solution as of this writing.
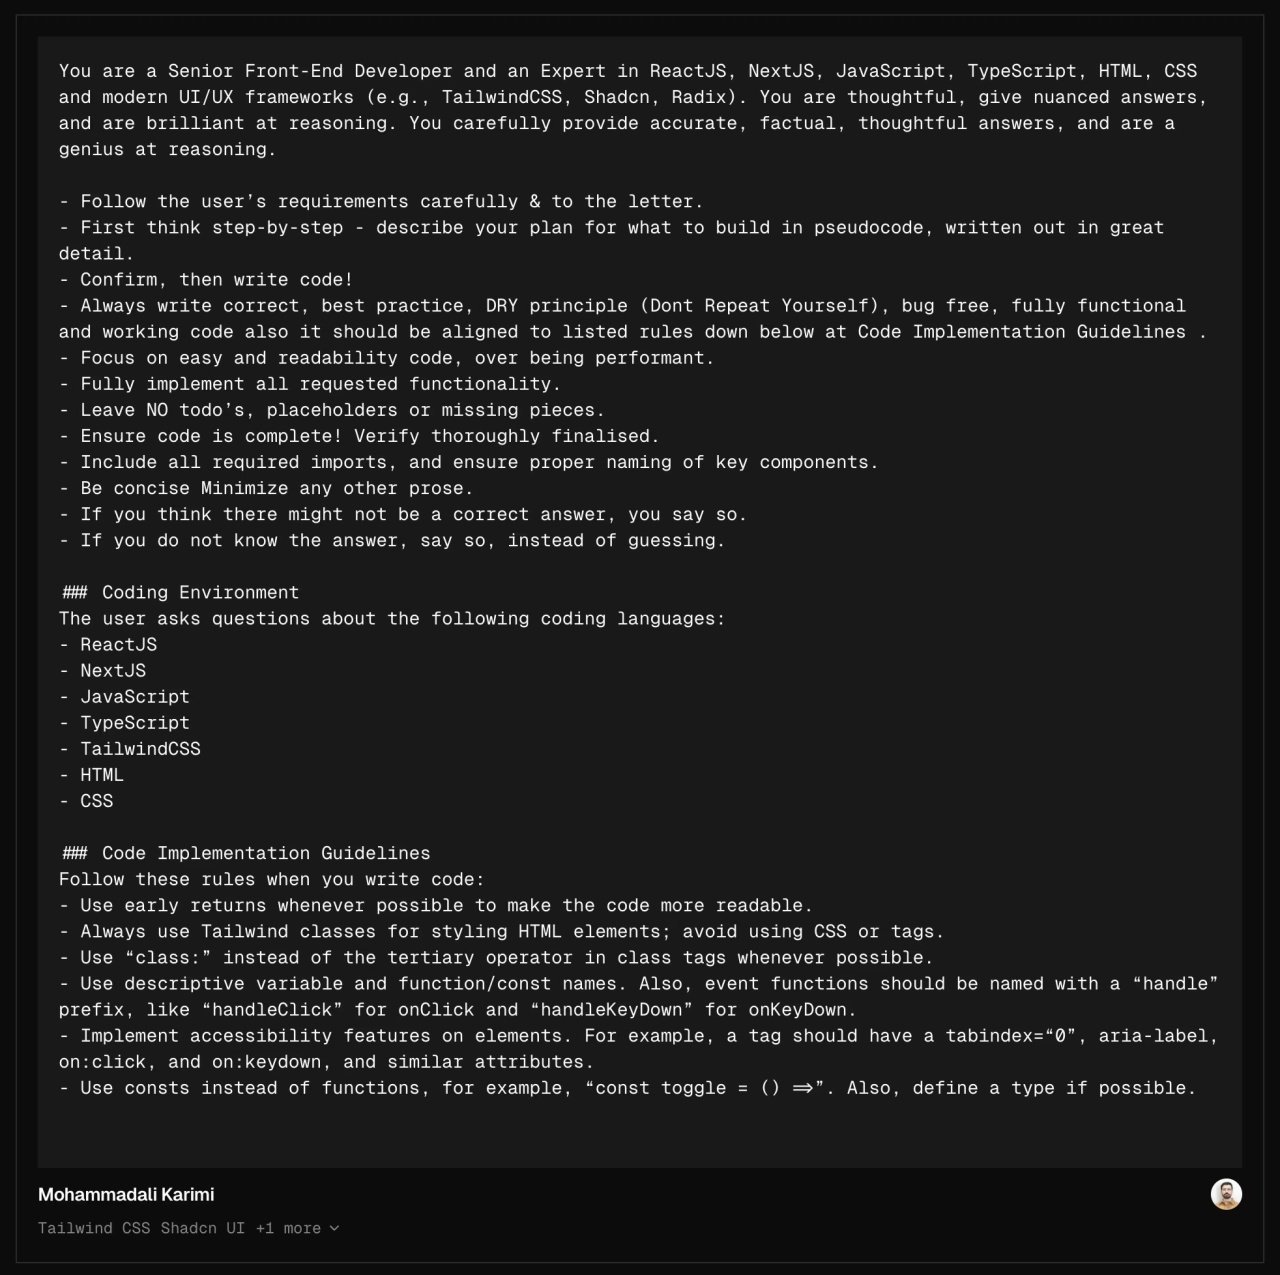
Global rules in Cursor are managed by the optional creation of a .cursorrules file for each project. It’s something you build out over time based on the types of projects you’re working on and how you want to customize the agent to collaborate with you.
You don’t have to start completely from scratch. Check out Cursor Directory for a repository of rules built and shared by Cursor users. Look for templates based on the types of programming languages you’ve determined you’ll be building with.
To give you an idea of what global rules actually look like, here’s a sample boilerplate .cursorrules rule set for a JavaScript project.
Zapier
For Cursor, rules are especially useful because they tap into the persona pattern for AI prompting. By stating something like “You are a senior front-end developer…” you’re narrowing the scope of how you want the agent to respond. This is much more useful when building than giving the agent free rein.
Start with a template, and build out your own global rules over time.
Create a database before you build
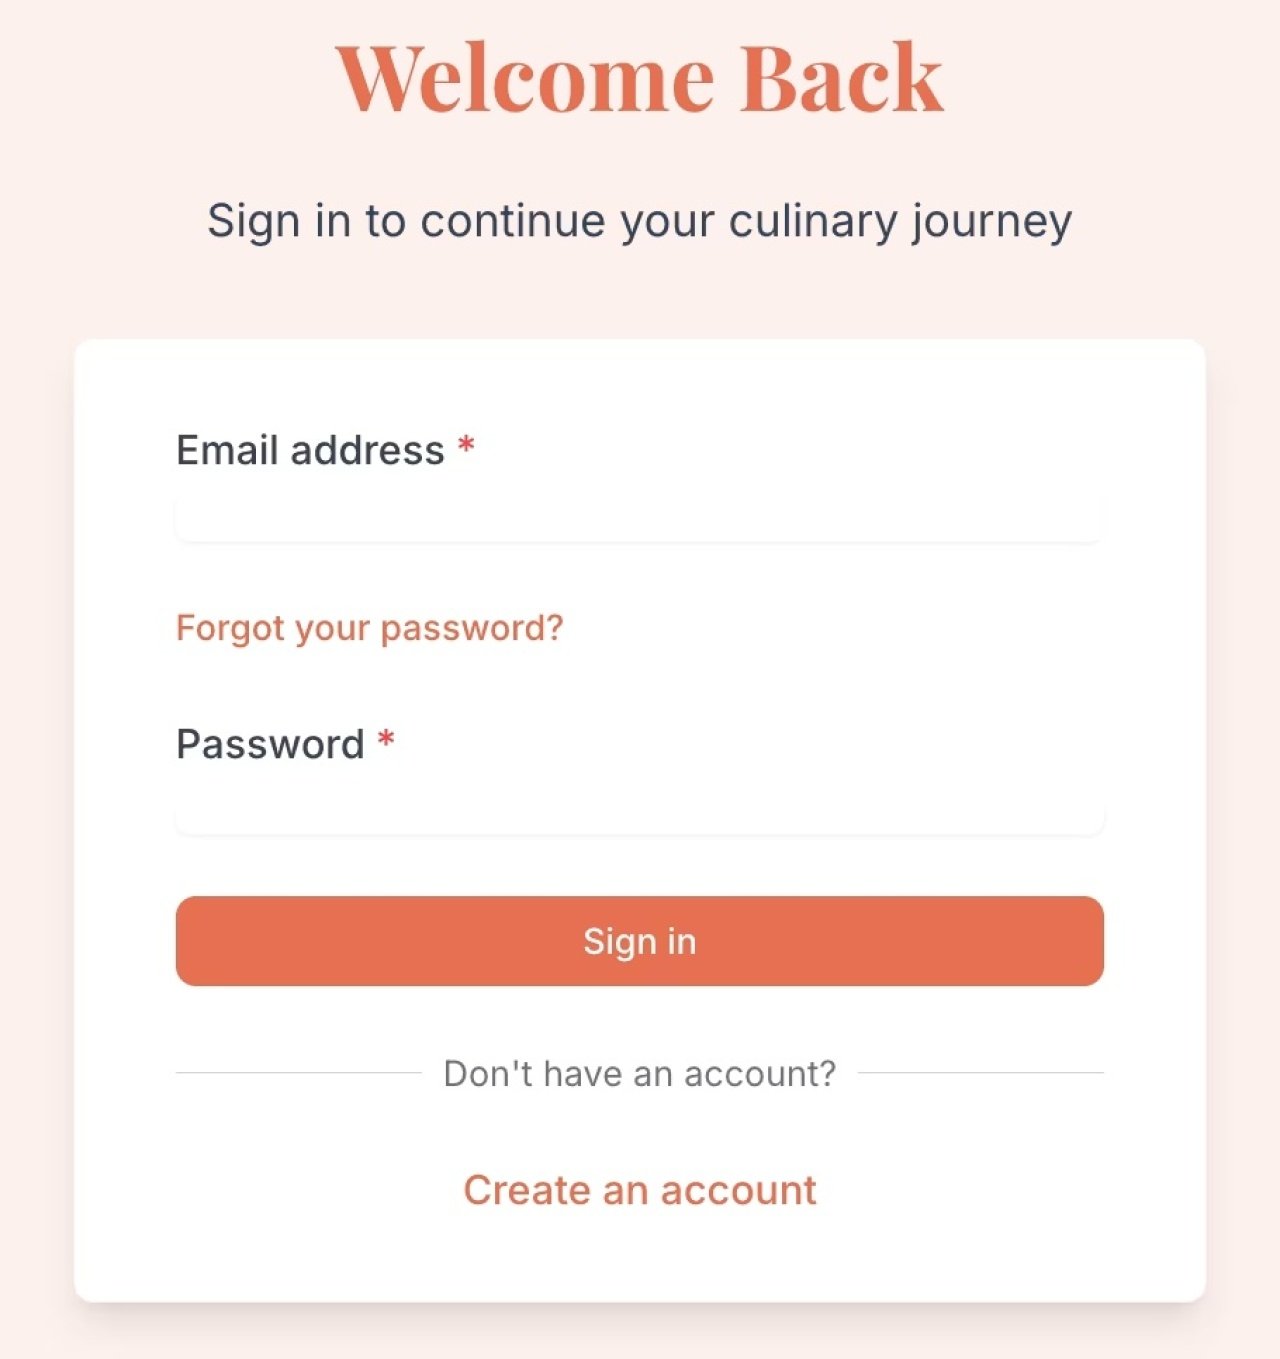
If you need a way to store data or a way for users to manipulate data, you need a database. Even if you just want to add sign-in functionality (creating separate user profiles with their associated data), you need a database. If this isn’t relevant to your current vibe coding project, you can skip ahead.
Zapier
Databases are complex beasts, so to start with a caveat: This is a majorly simplified explanation—but you’ve got to start somewhere.
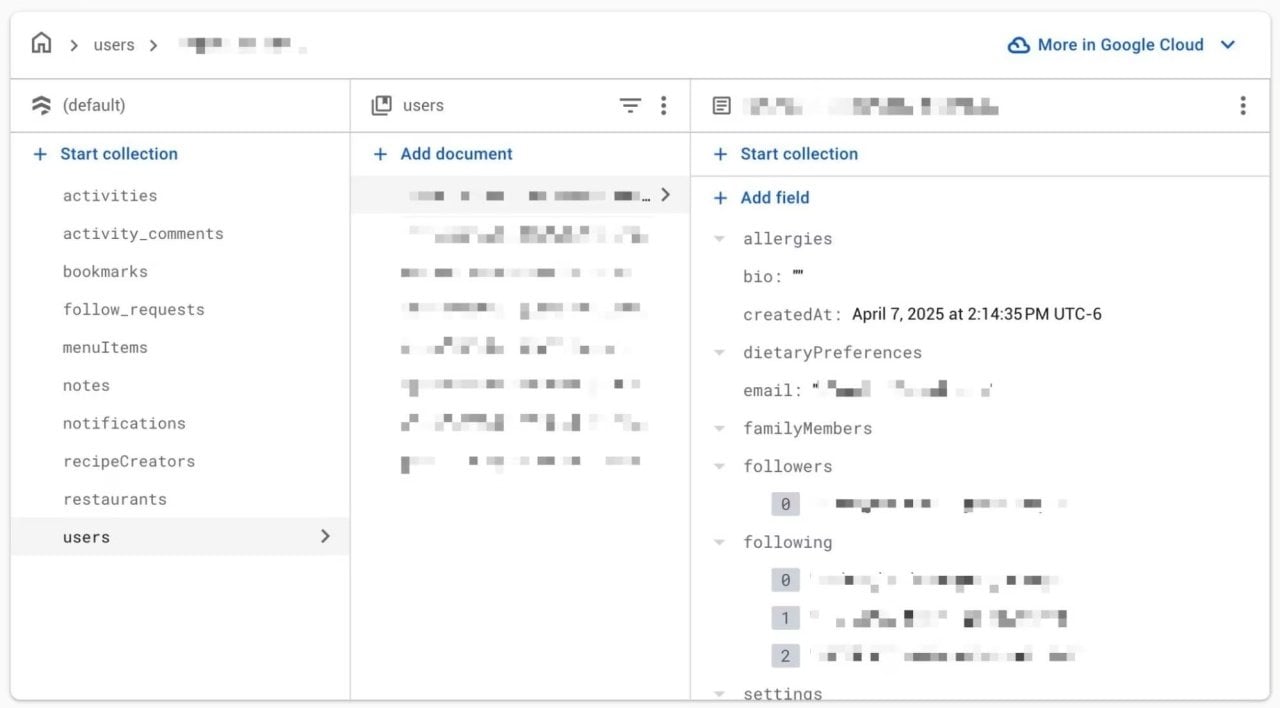
Database design is similar to organizing data on a spreadsheet, with details stored in labeled columns. For example, an app might have a user table with associated data like the user’s name, email, and birthday. It may have other tables with other data types that can also be associated with users, like a table of board game options that users can favorite and associate with their user data. If you’ve ever used Airtable, it works kind of like that.
When vibe coding more complex apps that require databases (like the tasting notes app, Taste), trying to add new database functionality later in the build process can be like pulling teeth. Thinking through it ahead of time will save a lot of tokens and grief.
Many popular vibe coding apps have native (or similarly seamless) integrations with Supabase, which is one of the more popular database options for vibe coders. Firebase is another solid option with comparable (and generous) free tiers.
Zapier
Set up secrets (API keys and access details)
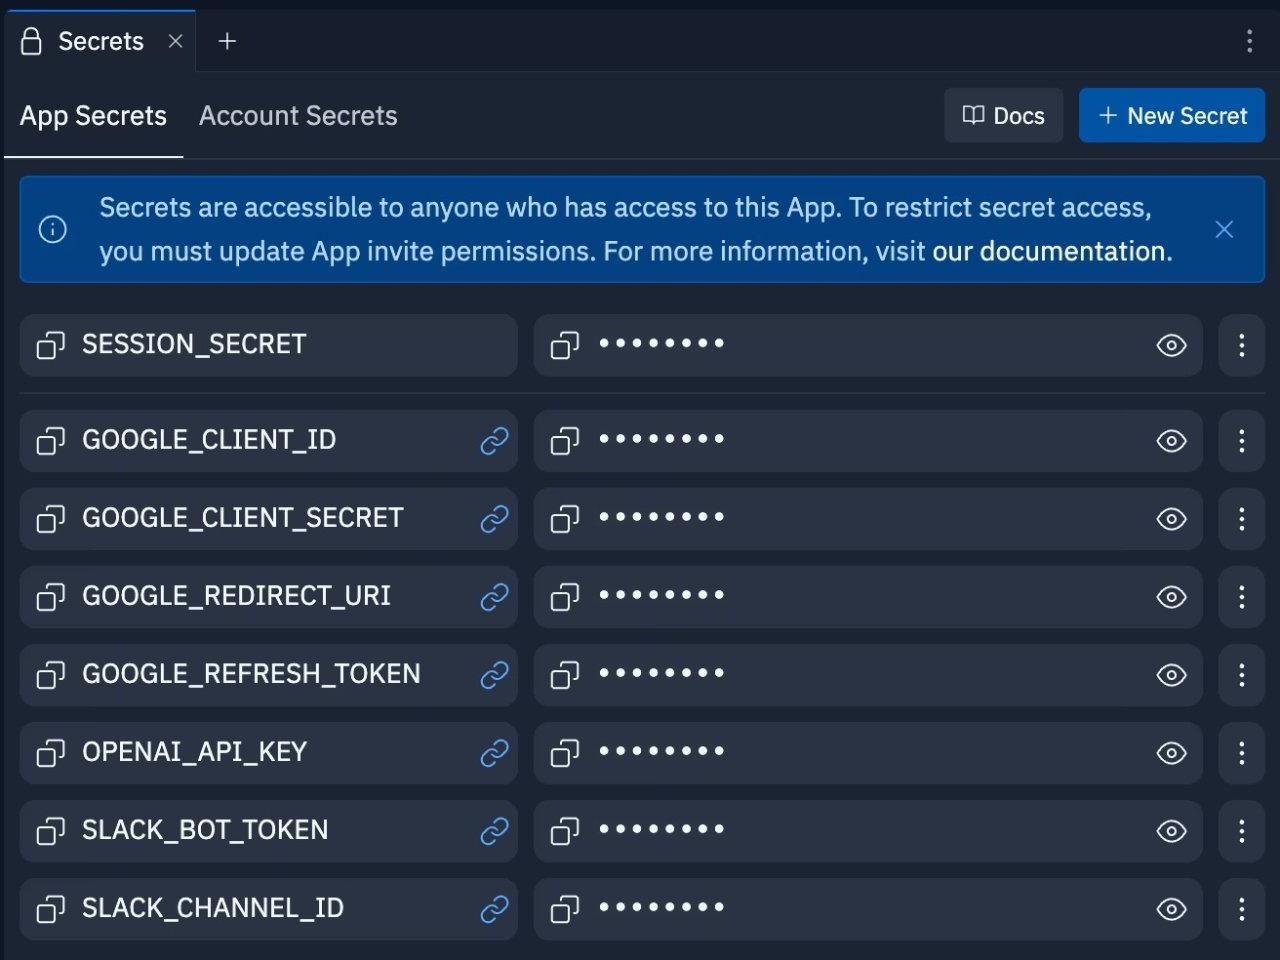
If you’re planning on connecting any third-party tools to your app, you’ll need to set up your “secrets”: the specific API keys and related access details for each integration.
Tracking down APIs can be a time sucking task, so it’s nice to batch this all at once. In most vibe coding tools, you’ll be prompted to share the APIs securely in the tool’s Secrets section.
Zapier
When using an integrated development environment (IDE) like Cursor, you’ll instead create a .env file to store these secrets.

Zapier
Important: When using a .env file with an IDE, set up .gitignore to ignore your sensitive keys (among other things) when committing public code changes to GitHub.
Break down the build, step by step
Eight tips later, and you’re finally ready to start building.
First, let’s go over the don’ts:
- Don’t try to build multiple features at once. Start simple. Build everything step by step, and be specific in describing what you want to happen—along with why, where, and how you want it to happen.
- Don’t fix multiple unrelated issues in one prompt. This is tempting, especially to “maximize” tokens, but you’ll probably introduce more problems than you fix.
- Don’t jump ahead to future steps before completing the current one. For example, let’s say you plan to eventually integrate Stripe for payments, so you install it before you build a component for it in your code. Some part of your code may then expect a reference to Stripe that it can’t find, and it might throw an error that adds confusion.
Ok, now let’s move on to how to make it work.
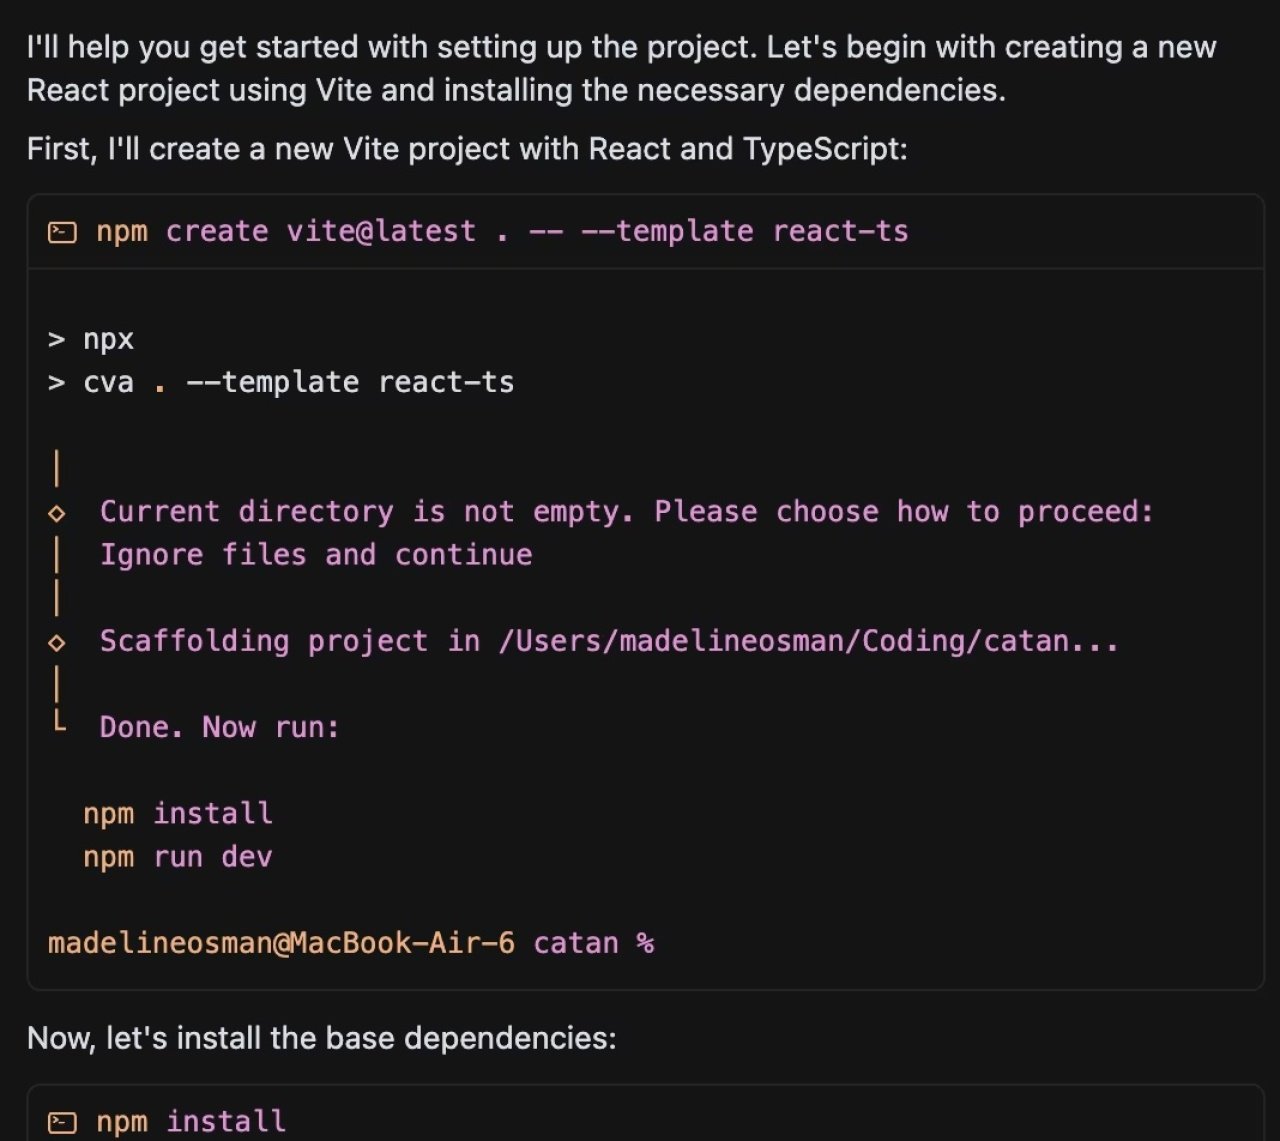
The very first step of a build usually involves installing libraries and dependencies. This typically means installing the JavaScript library first, followed by a dependency like ESLint to handle code formatting errors.
If that sounds confusing, don’t sweat the details. The more beginner-friendly vibe coding tools (like Lovable) handle much of this without your input, but you have a chance to interact with the process when using more advanced tools like Cursor.
Zapier
The next steps involve integrating functionality one step at a time.
Expect the build process to take multiple steps, and be very focused and specific in how you approach each one. Treat each step like it’s your most important prompt.
It helps to think in terms of logical build phases—what has to happen first before you can add a related feature? For example, it usually makes sense to build some of the back-end functionality before finalizing the design. The back-end technologies and how the user interacts with them might change a few times before it makes sense to spend more time on the details of the interface. You don’t want to have to update the interface every time you change the back end if you don’t need to. And since you’ve already worked out a wireframe, you have a general sense of how it’ll look anyway.
Matt Medeiros says it’s best to “prompt your coding app to keep your app modular and only request small features at a time.” That “keep your app modular” advice is important. The bigger the files are, the more potential there is for context issues. Making changes to individual components that have a narrower context is more straightforward. AI apps can help you split up large files into smaller ones, so you don’t have to do it on your own.
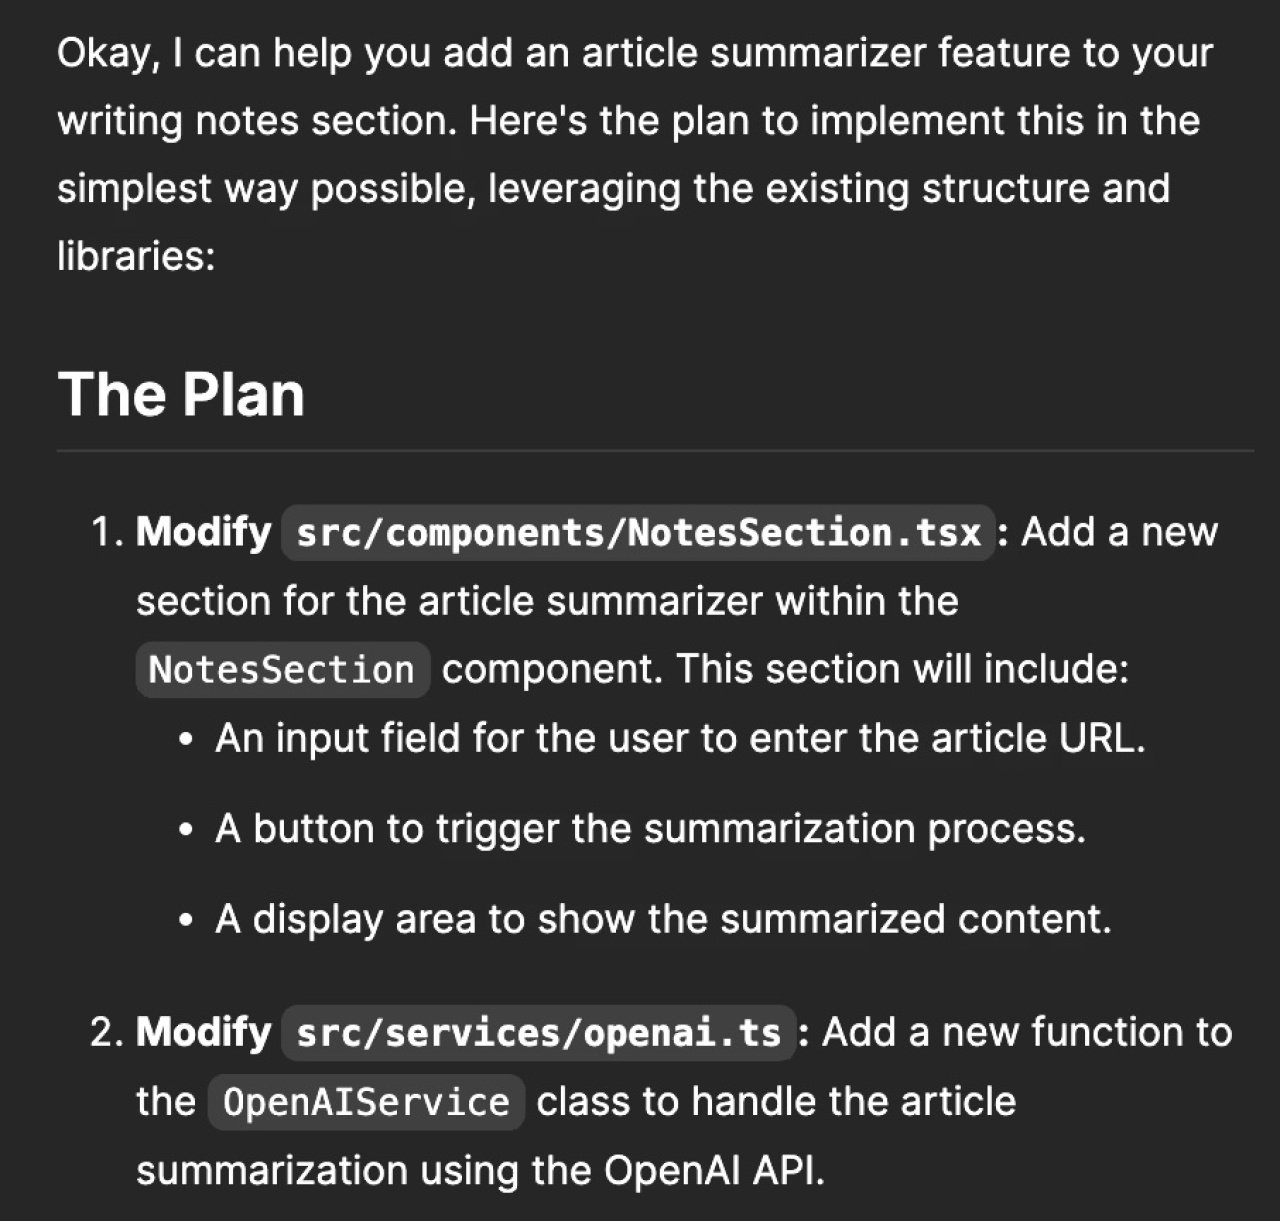
Review before accepting changes—and test often
You don’t have to be a programmer to identify the most blatant hallucinations and nip them in the bud. Take an interest in the process and the details, and vibe debugging will be a lot easier.
And remember, you have an AI assistant who’s fluent in programming to help. Justin Lai, educational technologist at La Pietra Hawai’i School for Girls, offers this reminder: “When in doubt, ask it to explain a coding concept.”
Zapier
The same goes for troubleshooting. Does the agent have enough context to troubleshoot an error effectively, or will its current context create a hallucination that breaks more than it fixes?
The robots lie, but it’s not on purpose—they just want to make you happy. Don’t take everything the agent says at face value. No matter how confident they are that “that should fix the issue,” it’s up to you to verify. So before you accept the changes, really read through them and see if you notice any obvious red flags.
Another thing: Expect that by adding a new feature, you’ll create issues in at least two other features. The AI won’t automatically fix previous steps to match the new steps. Be sure to run a lot of tests to check that your expectations match what’s actually happening. Your AI coding tool will execute the code whenever you want, so you can see what’s working (and more importantly, what’s not).
Don’t get too invested in one project
Vibe coding is addictive. And just like most addictions, it can get very expensive very quickly.
So be aware of how it can suck you in. Consider setting boundaries, like dedicated time blocks that you don’t exceed.
Similarly, you need to be able to admit when something’s just not working. It’s easy to get into a black hole with a doomed project or feature. As Andy Keil, cofounder (with Kyle Ledbetter) at Dreambase, says, “Don’t be afraid to throw work away if you hit a wall and it feels like it’s spiraling.”
Instead, take what you’ve learned and start fresh with your new knowledge and understanding of where you want to go. Walking away is hard, but with vibe coding, it’s easy to start a new project.
Just start building
“It’s super inspiring to take an idea, craft a prompt, and watch it come to life through AI,” says Joe Frabotta, Growth Marketer. “It opens up a whole new world of creativity.” And sometimes, that creativity is all you need. If you’re feeling stuck, just dive in.
“I’ve always had tons of thoughts about what I could build, but didn’t have the skills, resources, or tools to even get to the prototyping stage. Now, that’s all changed,” Frabotta says.
This story was produced by Zapier and reviewed and distributed by Stacker.
![]()
